
When you create a new page on your website, it may not automatically appear in your navigation menu. You may need to manually add the page to the menu and organize its placement.
Step 1: Navigate to the Menu Settings
From your WordPress dashboard, go to:
Appearance → Menus
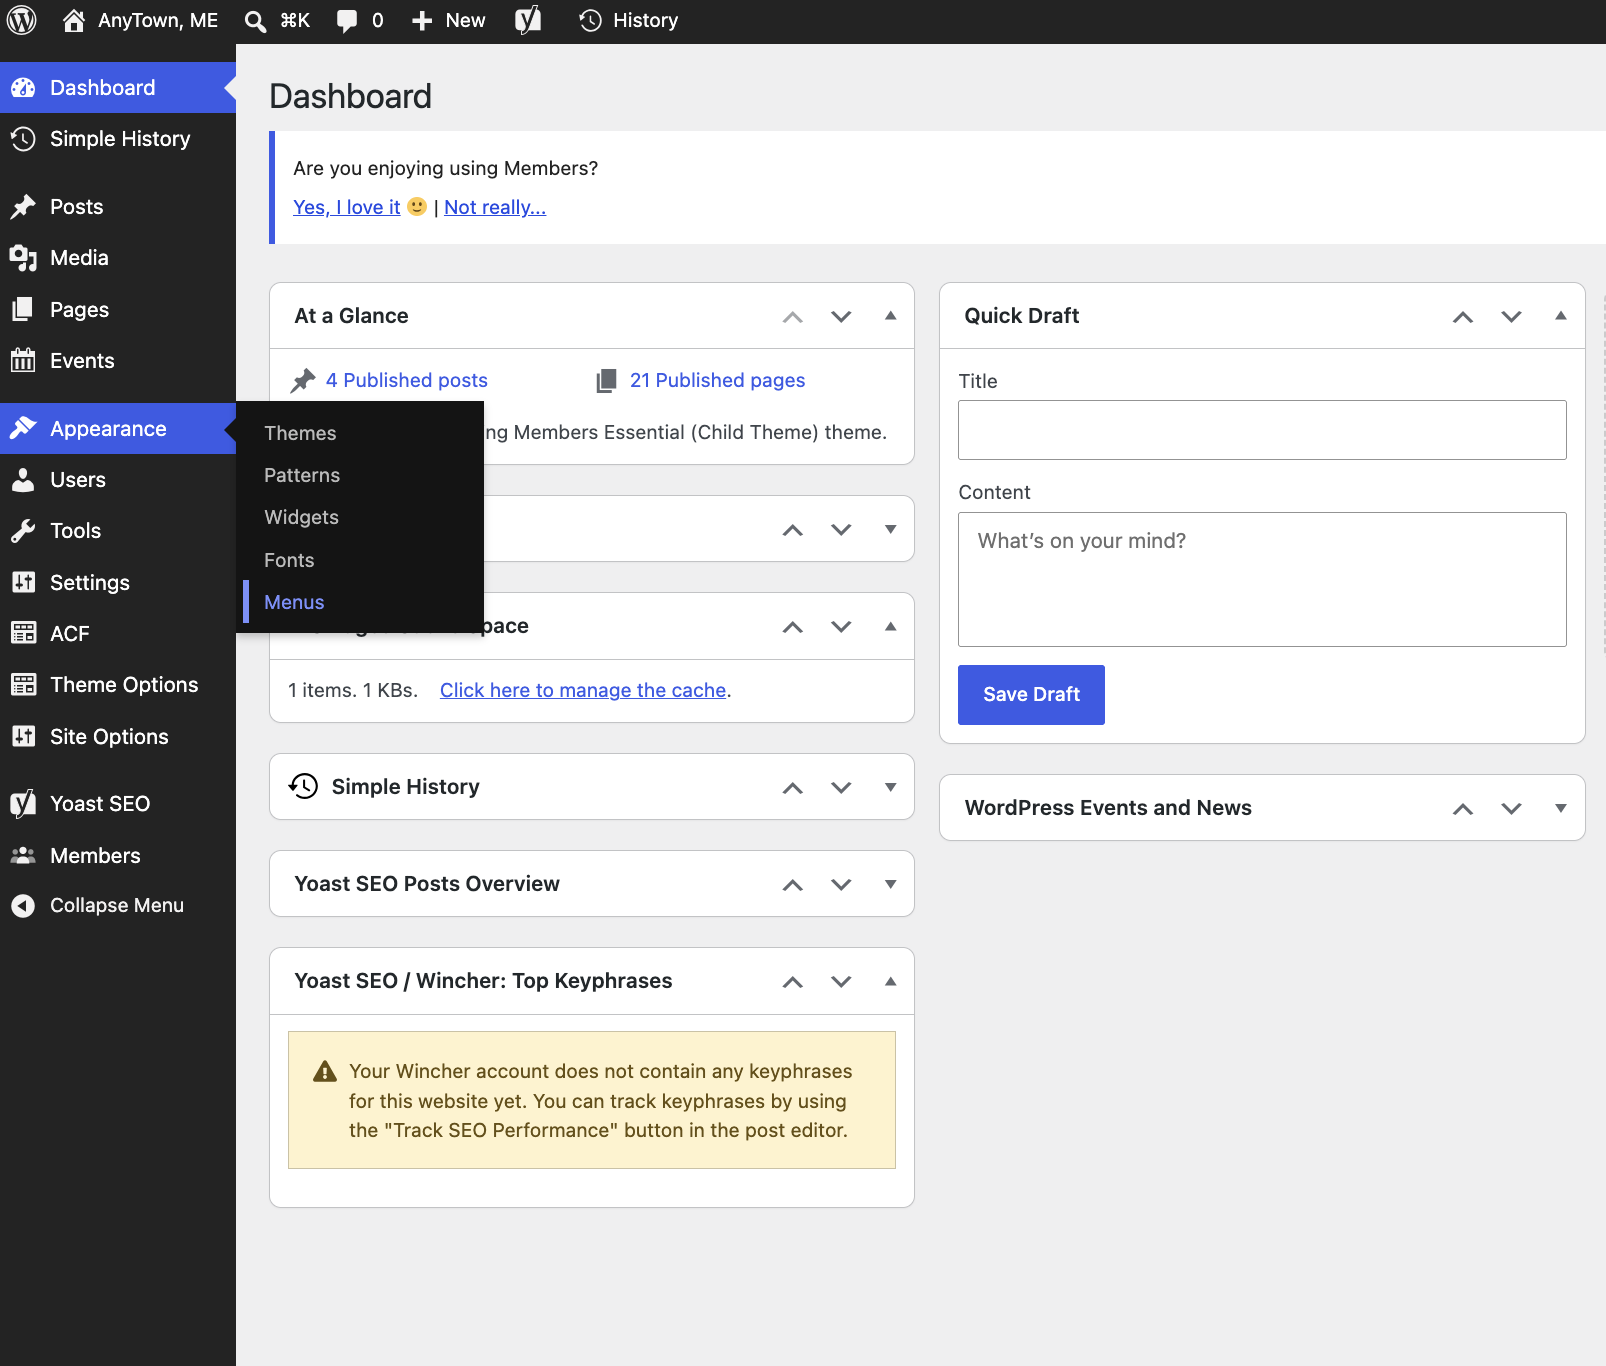
Step 2: Select the Page You Want to Add
On the left side of the screen, locate the Pages section.
If you do not see the page you recently created, select View All to display all available pages.
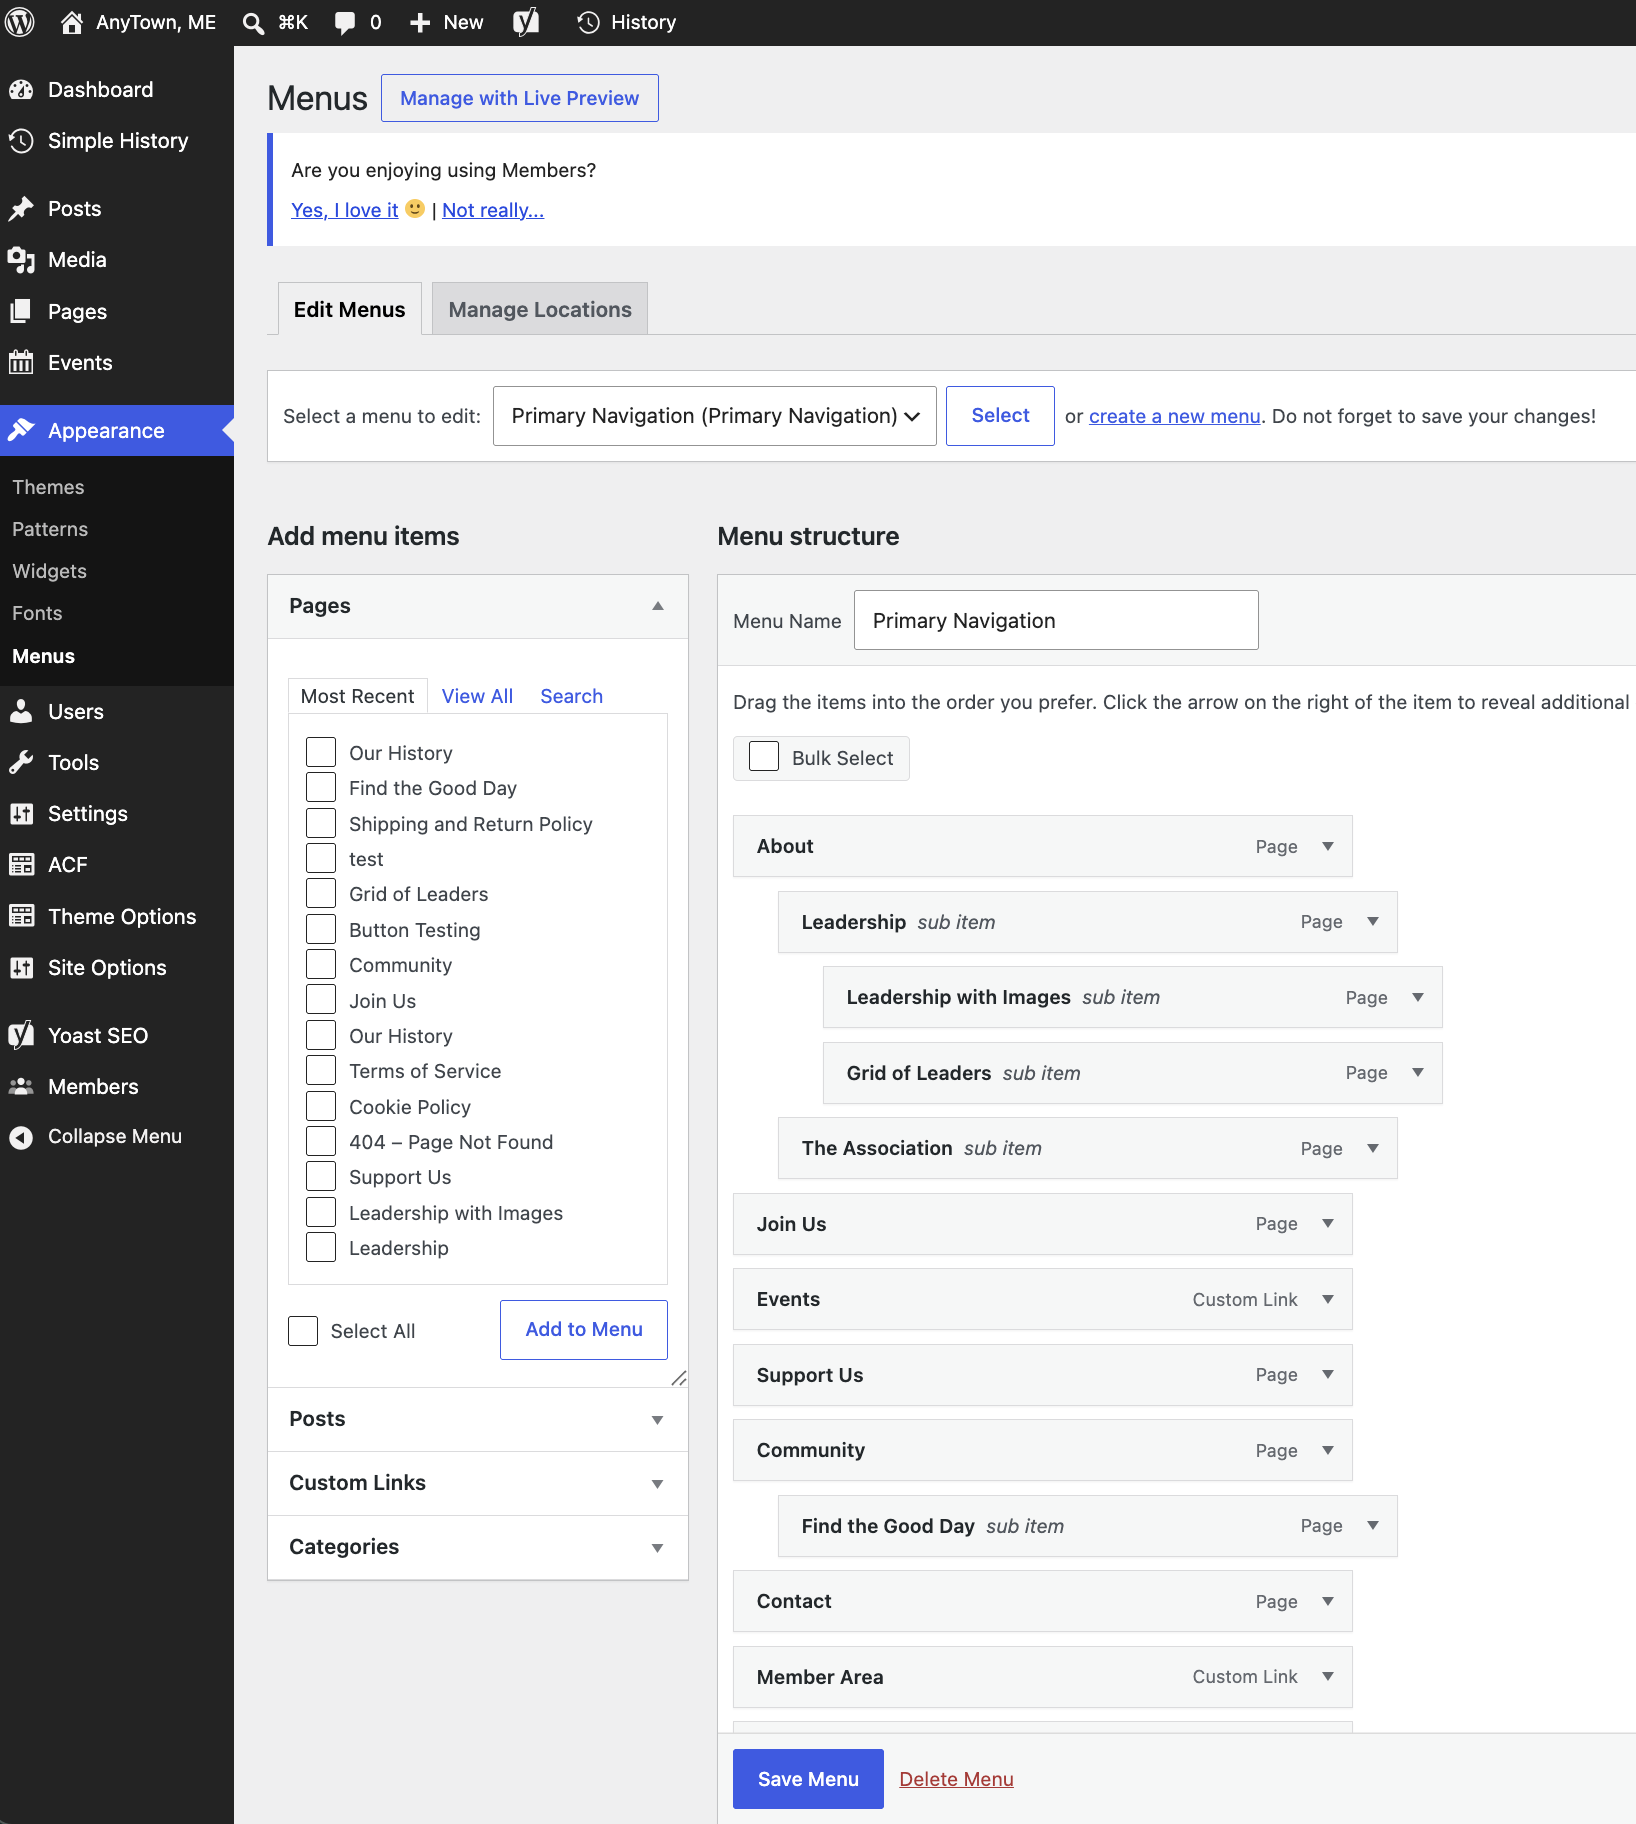
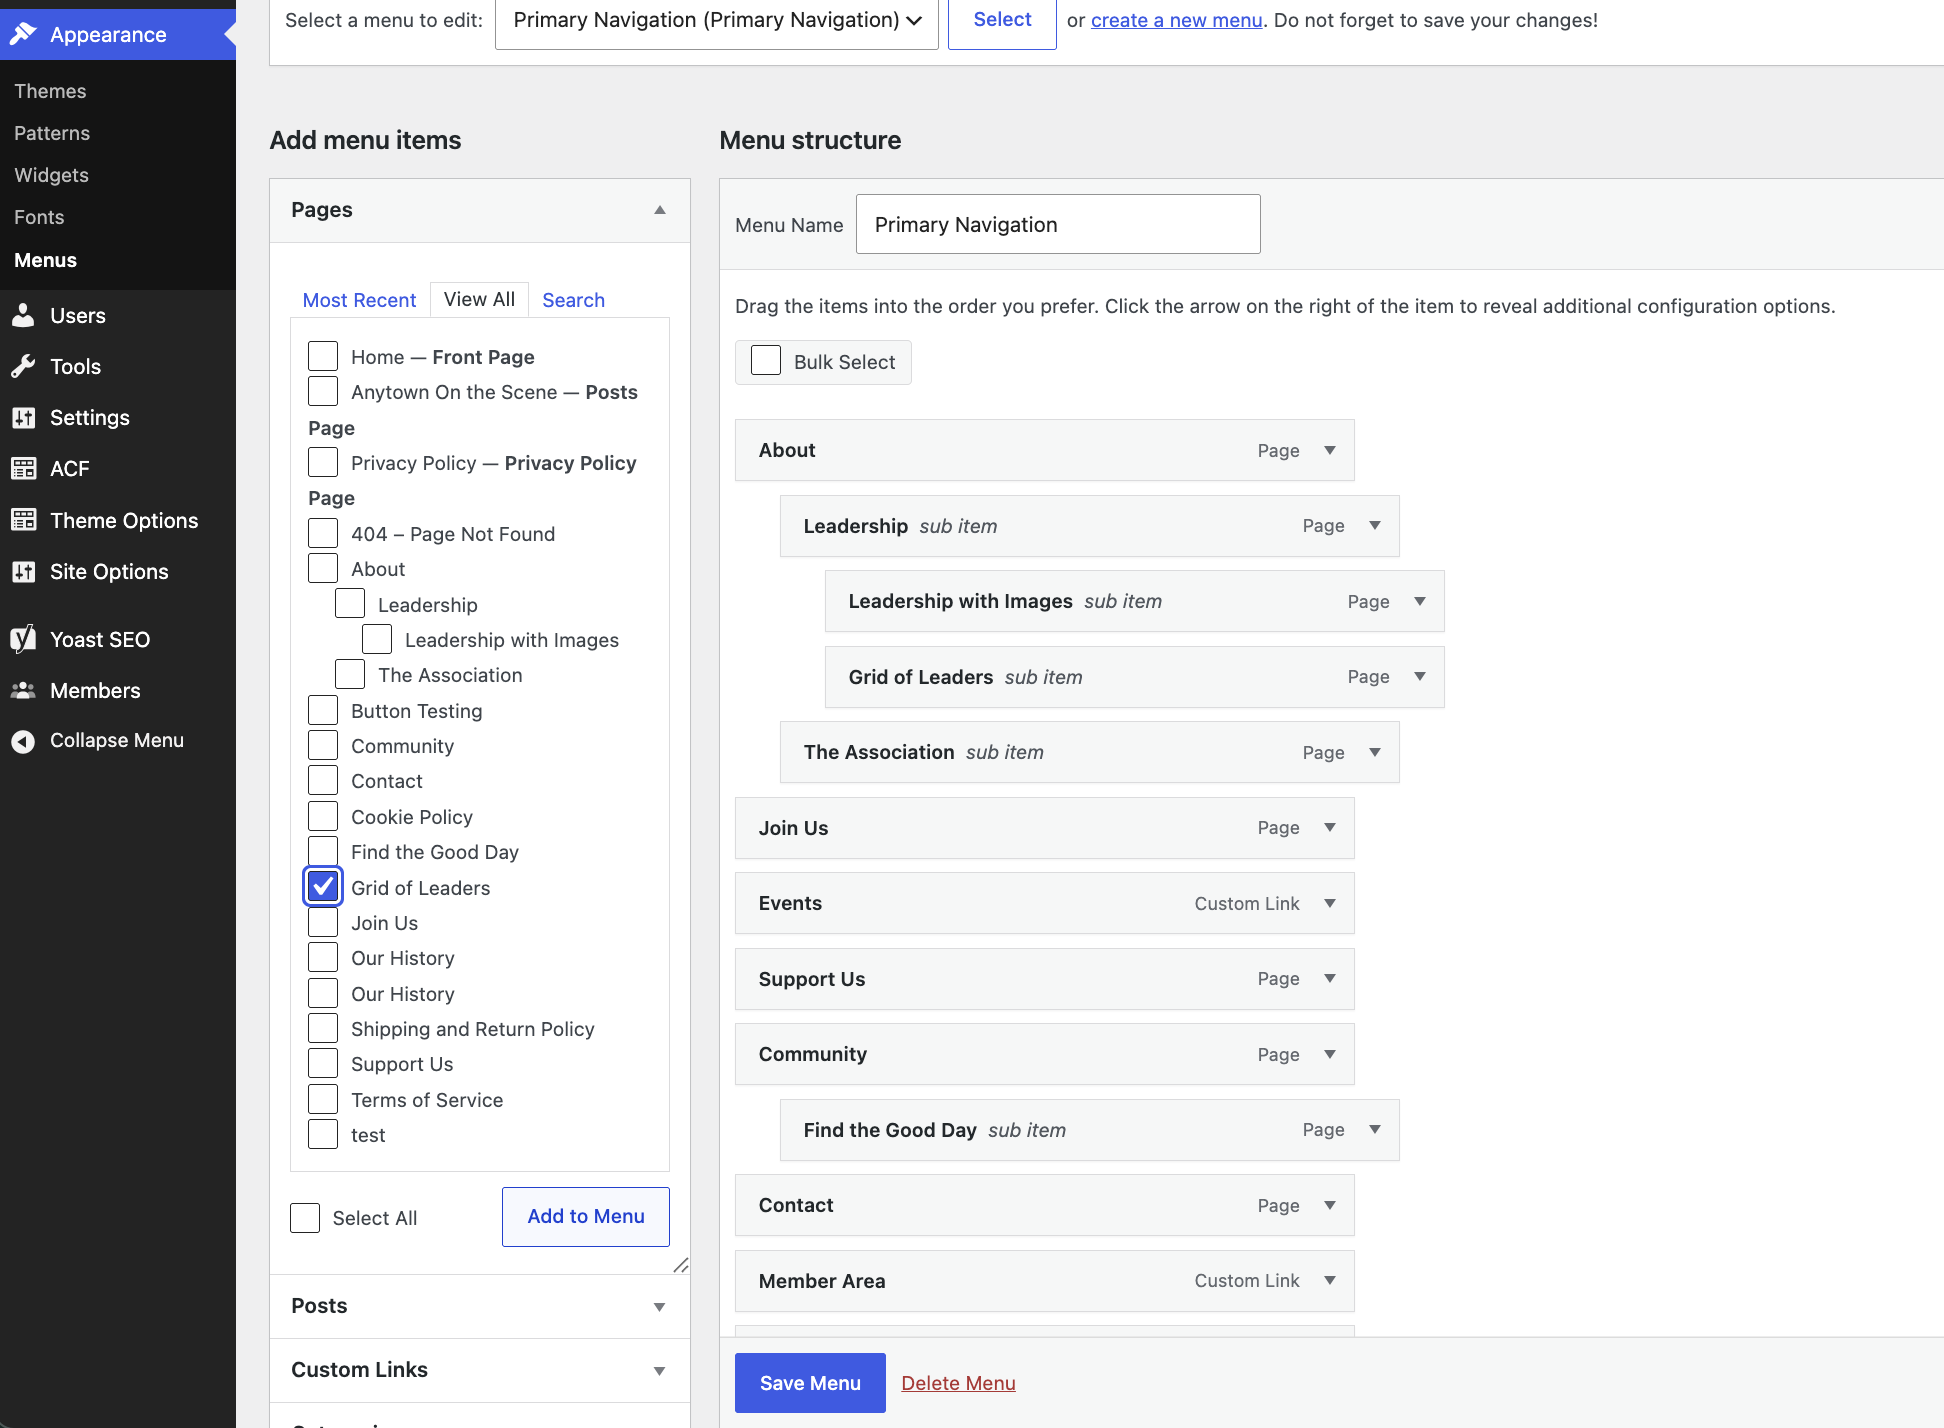
Step 3: Add the Page to Your Menu
Locate the page you want to add, select the checkbox next to it, and click Add to Menu.
The page will be added to the menu structure on the right side of the screen.
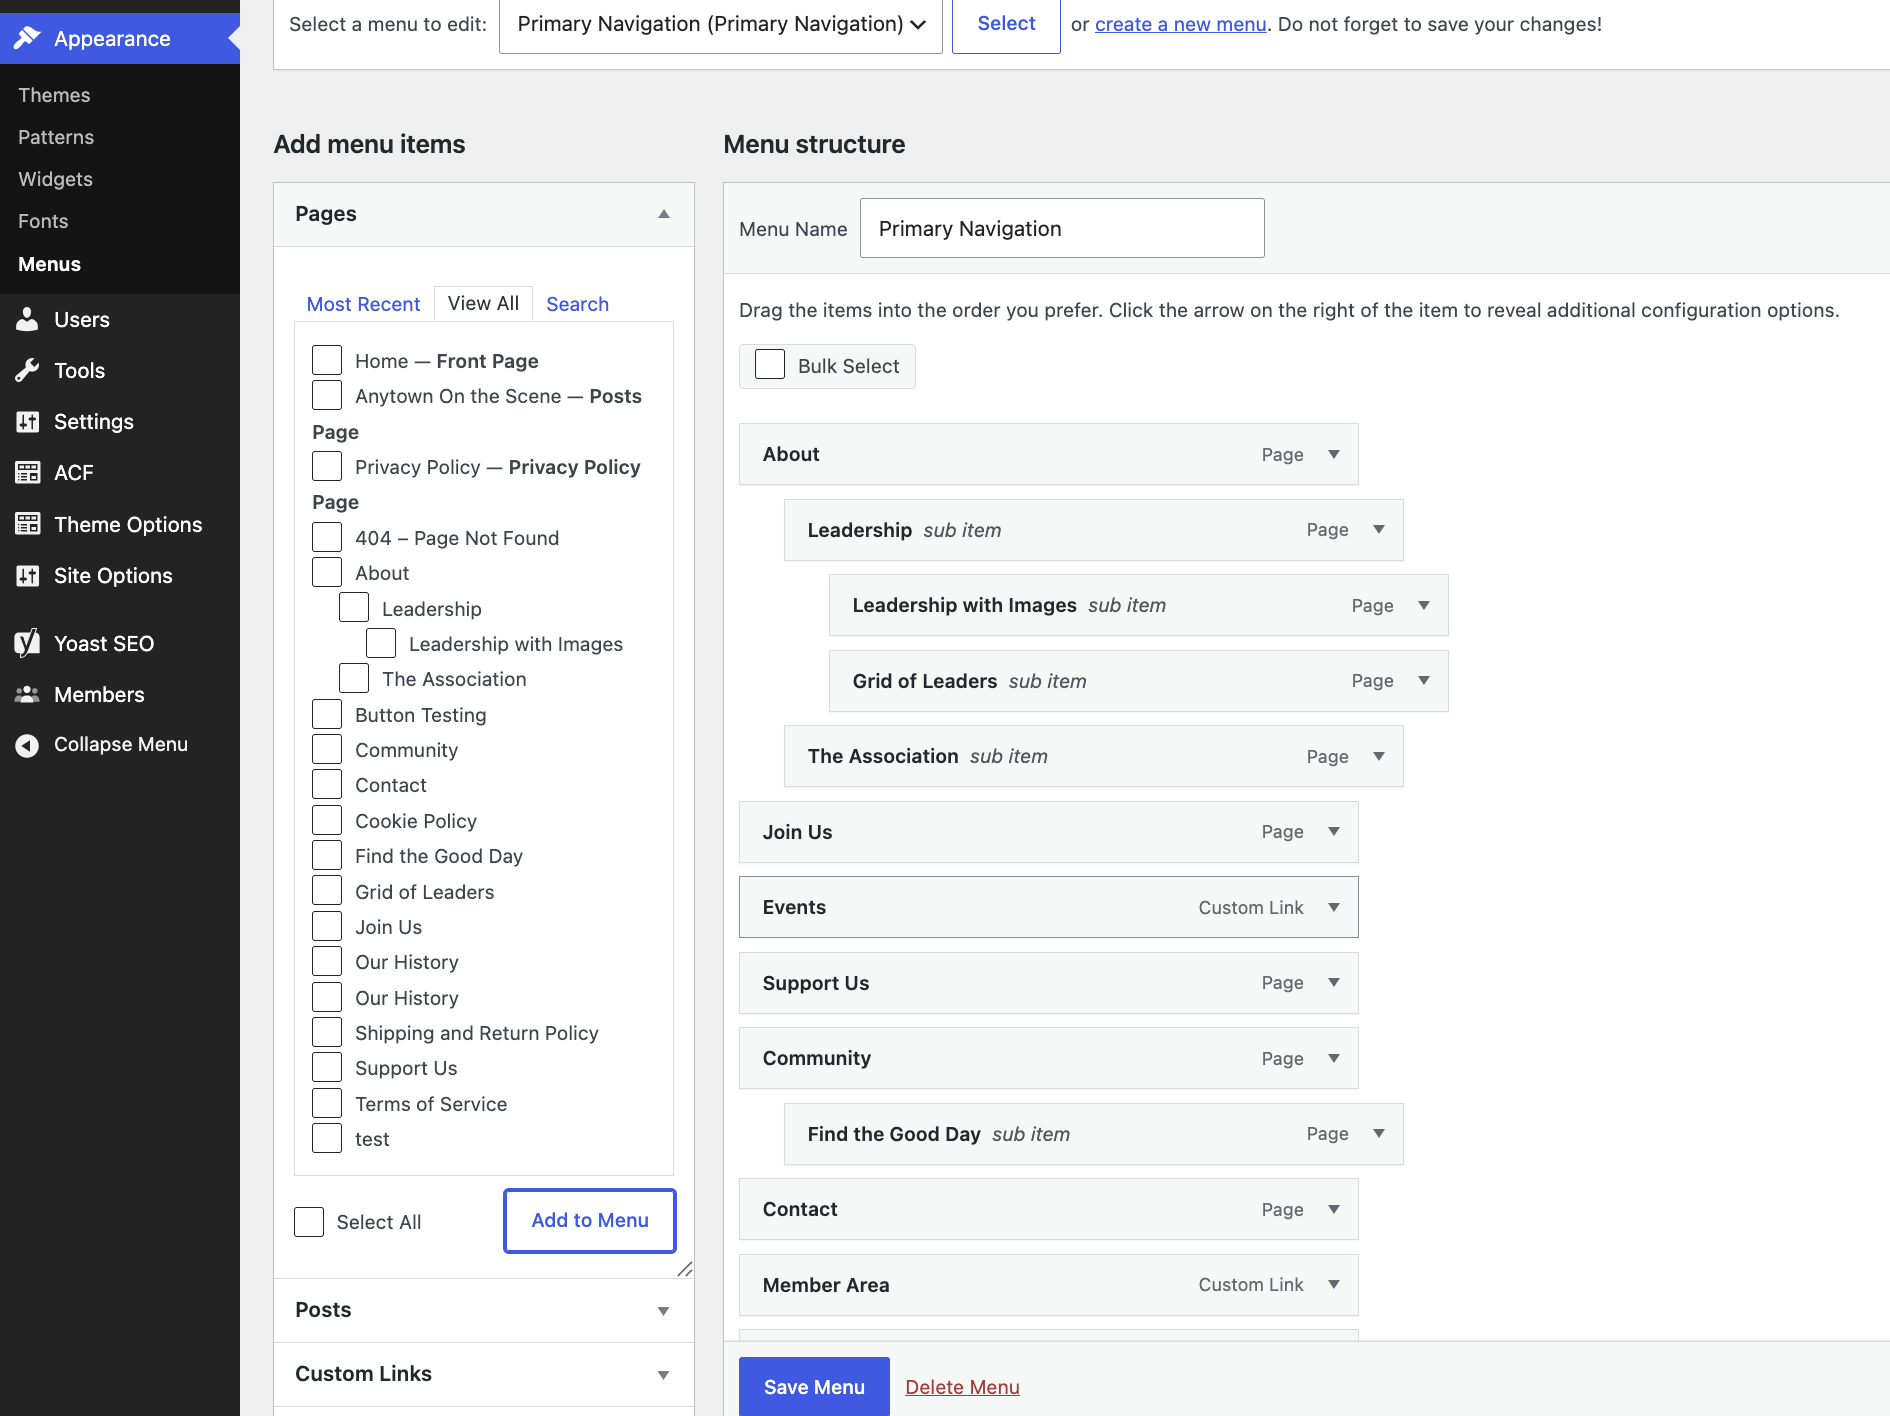
Step 4: Organize the Page in the Correct Location
Drag and drop the page into the appropriate location within your menu.
To make a page appear as a dropdown item, drag it slightly underneath and to the right of the parent page.
For example:
About
Leadership with Images
Grid of Leaders
You can also drag pages up or down to change their order within the menu.
Step 5: Save Your Changes
Once the page is in the correct location, click Save Menu.
Your changes should now appear in your website navigation.
Important: Do Not Delete Your Existing Menu
Do not delete the existing menu when making updates.
If you need to add, remove, or reorganize a page, make those changes within the existing menu structure. Deleting the menu may remove your website's navigation and require additional work to restore it.
If you need assistance, please submit a support request or schedule a support call for guidance.