
Mailchimp has updated its platform so that users on the Free plan are now limited to a single Audience. If you are setting up a sync from Member Essentials and already have an existing Audience in Mailchimp, we recommend the following options.
- Sign into your Mailchimp Account
- On the left, select Audience.
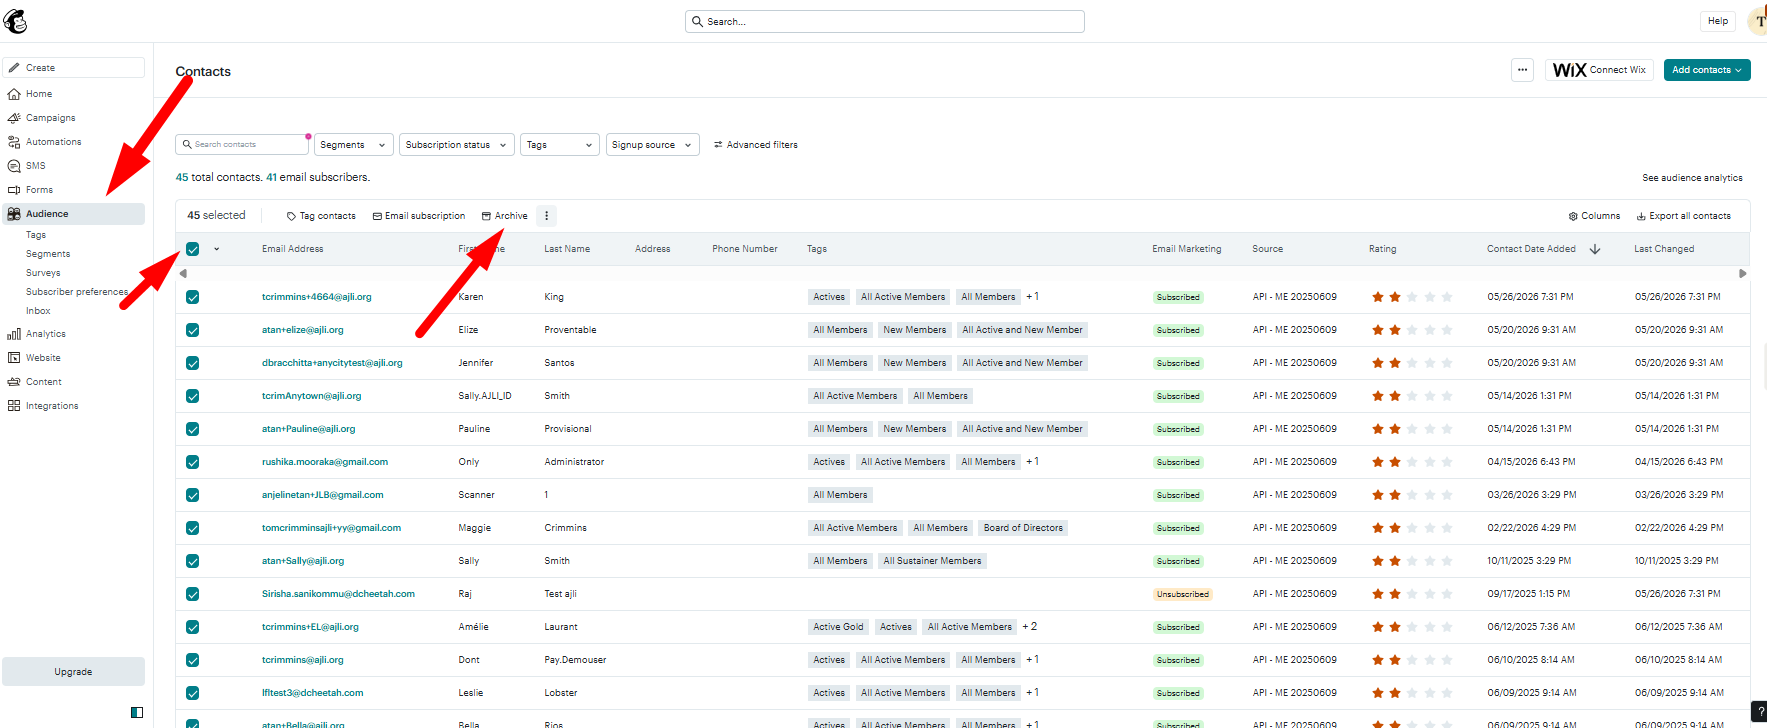
- Then, select all the accounts by clicking on the checkbox below All selected
- Click on Archive.
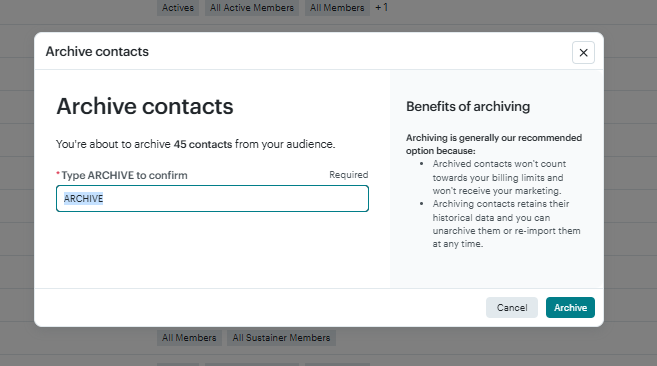
- The system will ask you to confirm by typing ARCHIVE.
- Select Archive to confirm.
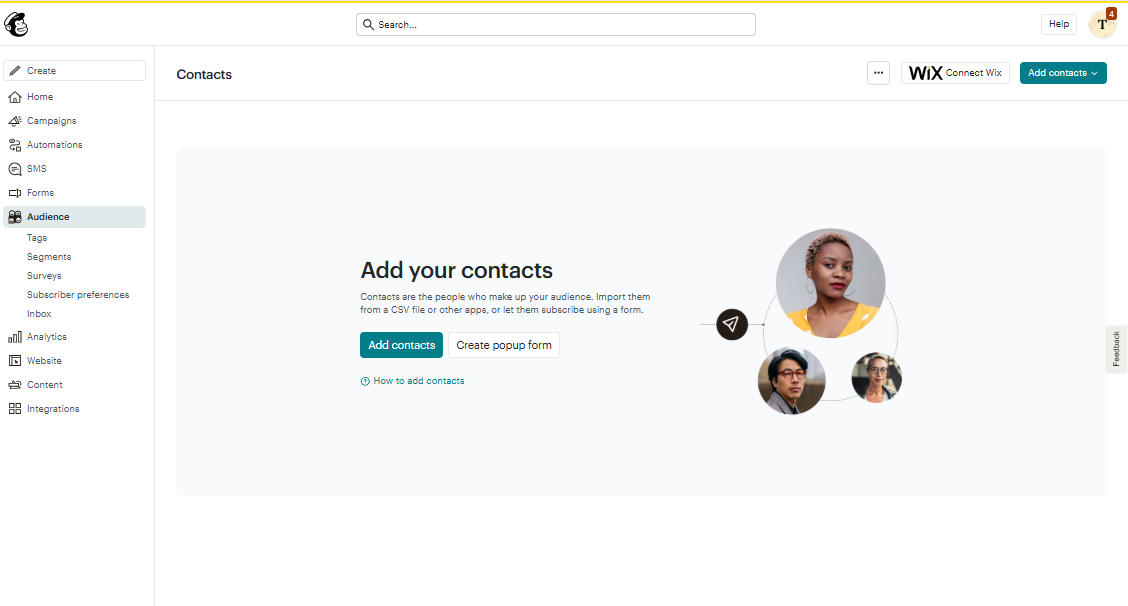
- Repeat until all the email accounts are archived. Take note, this is what the screen below looks like with all contacts removed.
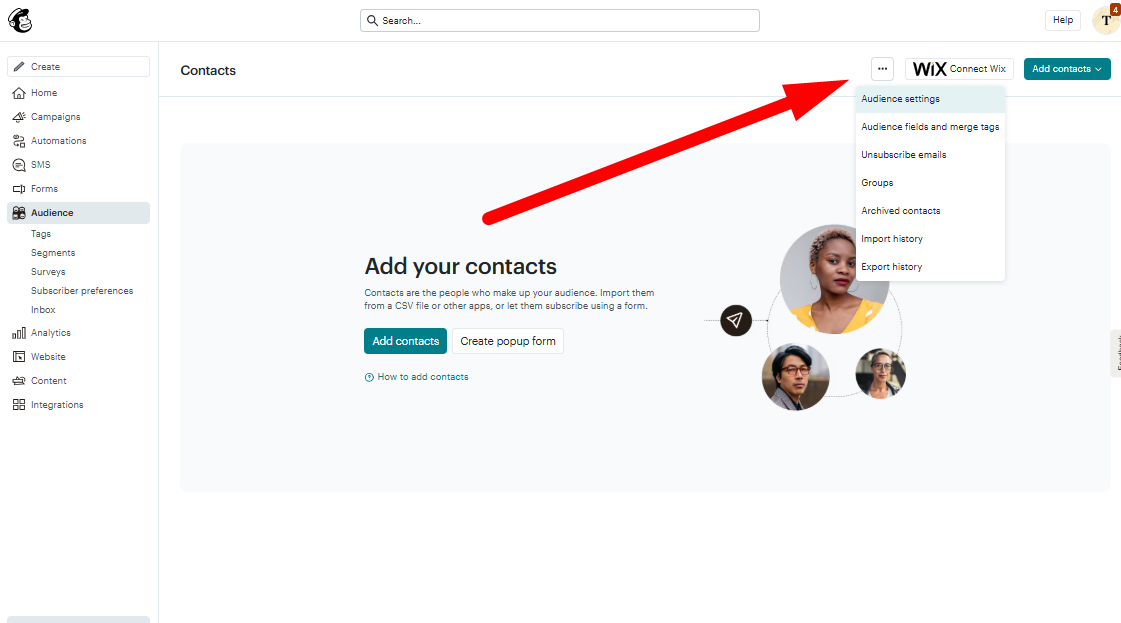
- Next, from the left, click on Audience.
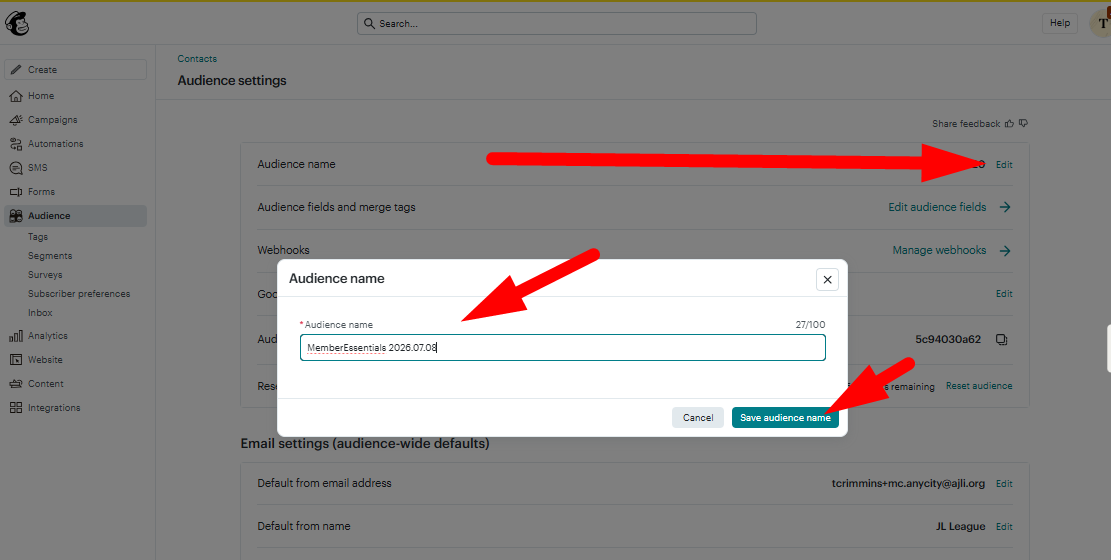
- Then, on the upper right, select the three dots and find Audience settings.
- You can enter the Audience Name (putting the date in the name can helpful).
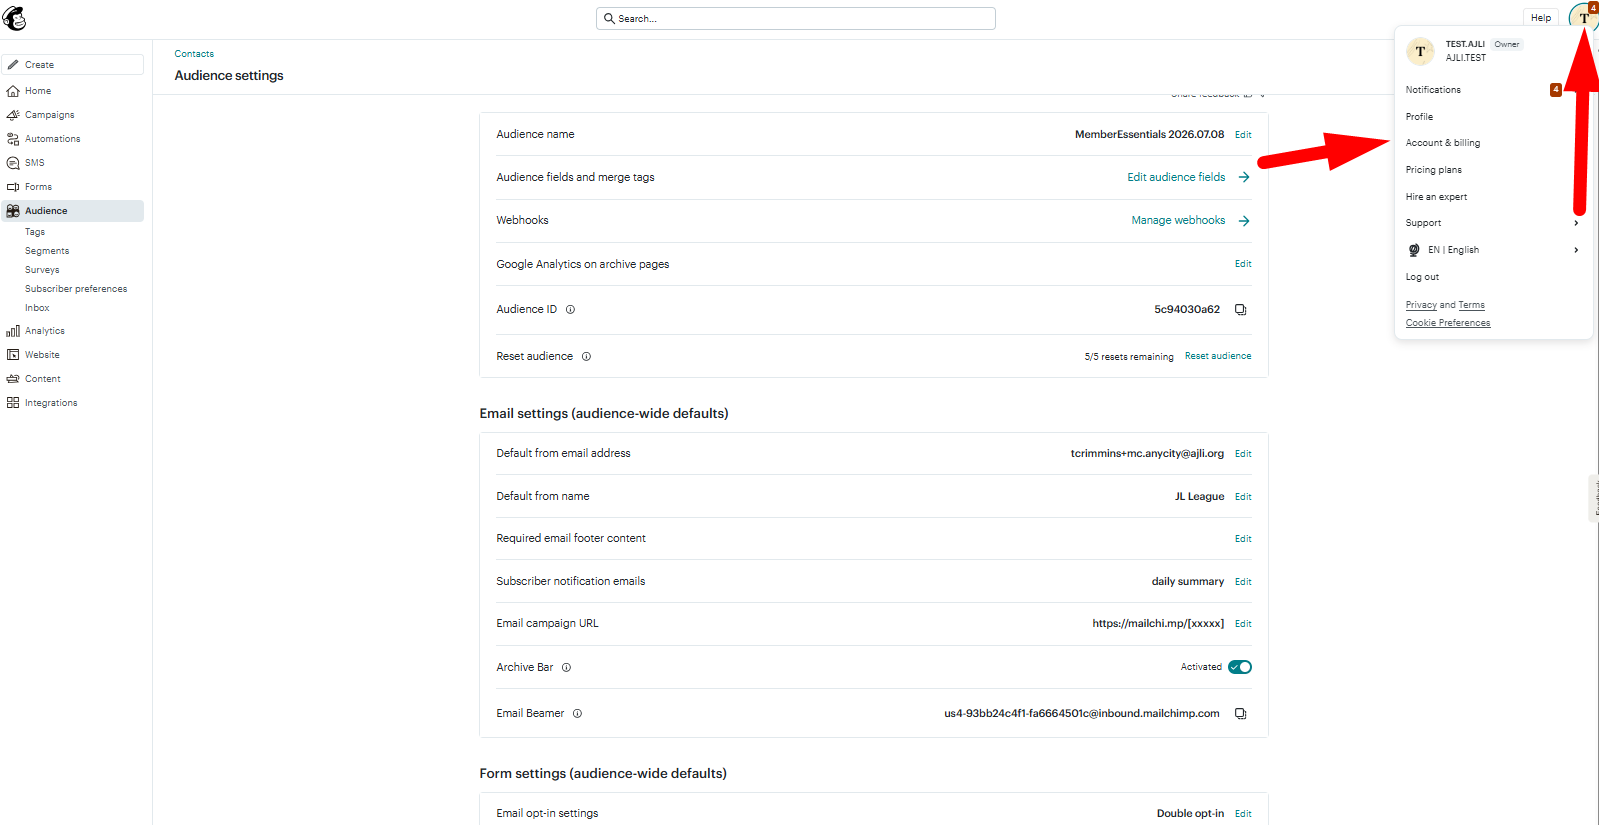
- You can now follow the usual steps to obtain your API key by clicking the profile icon in the upper-right corner of your Mailchimp account, located next to Help.
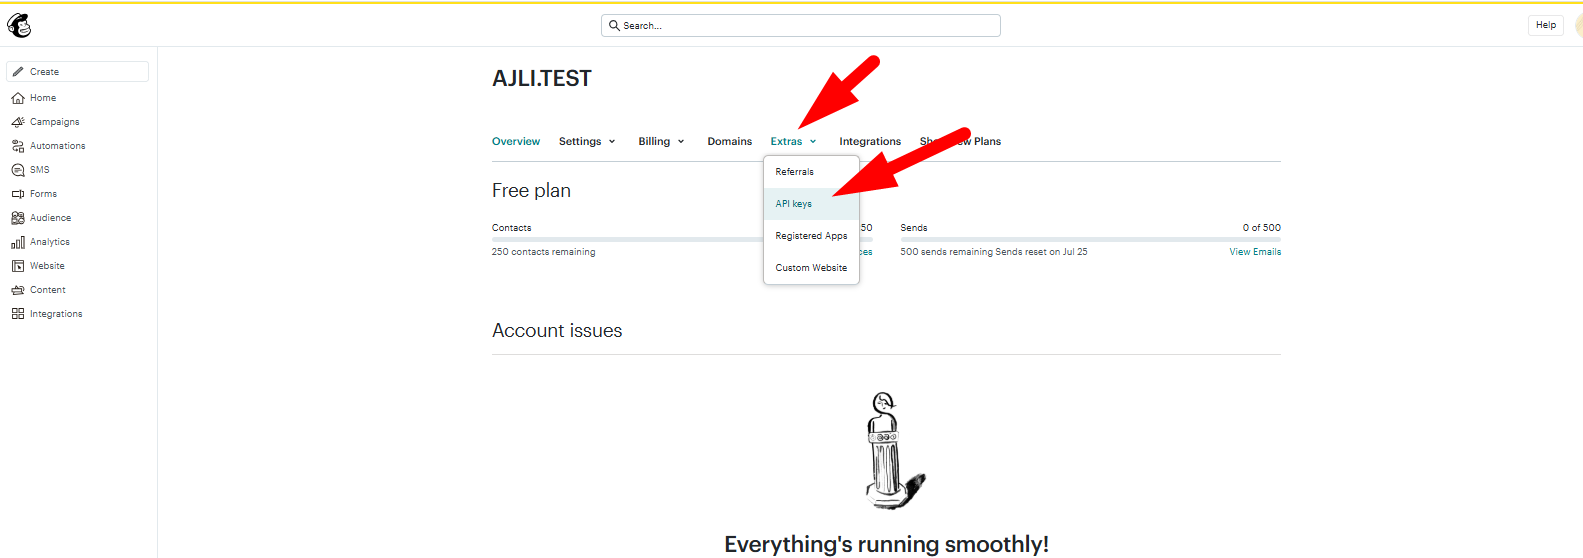
- Select Extras > API keys
- Below Your API keys, click on Create A Key.
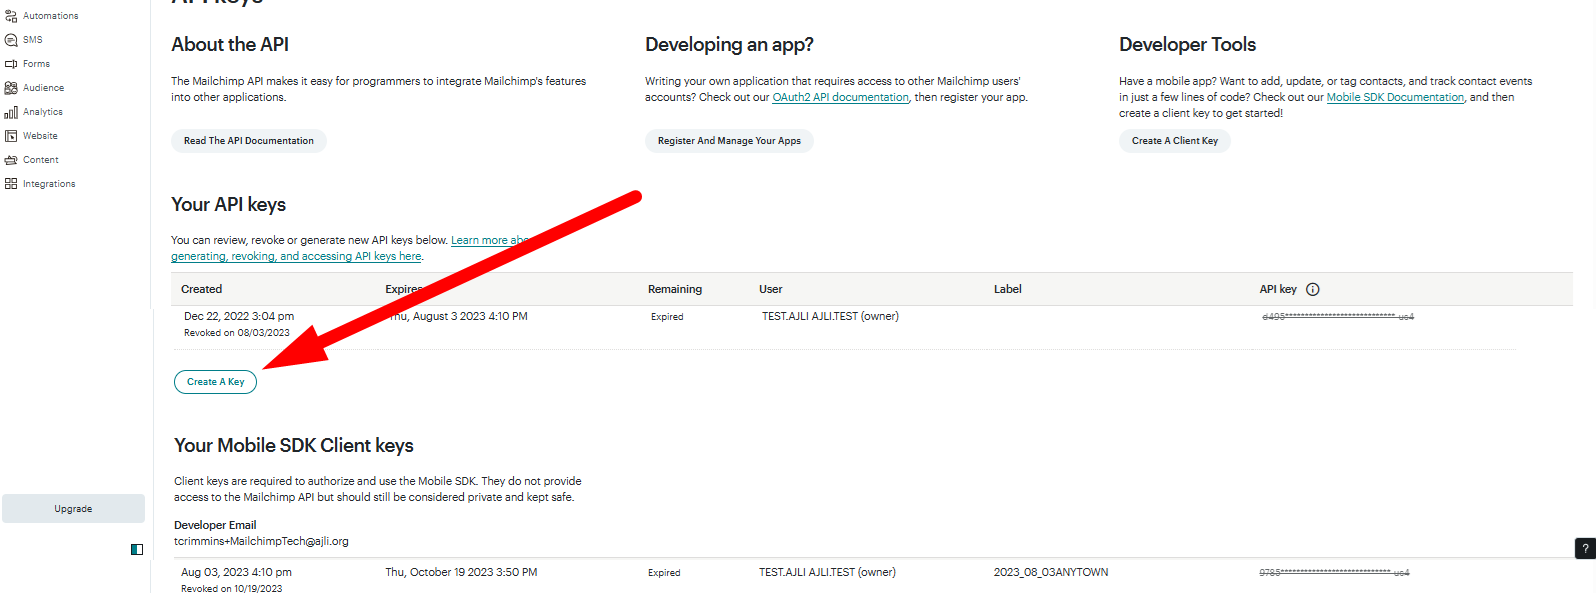
- Enter a descriptive name and include the date.
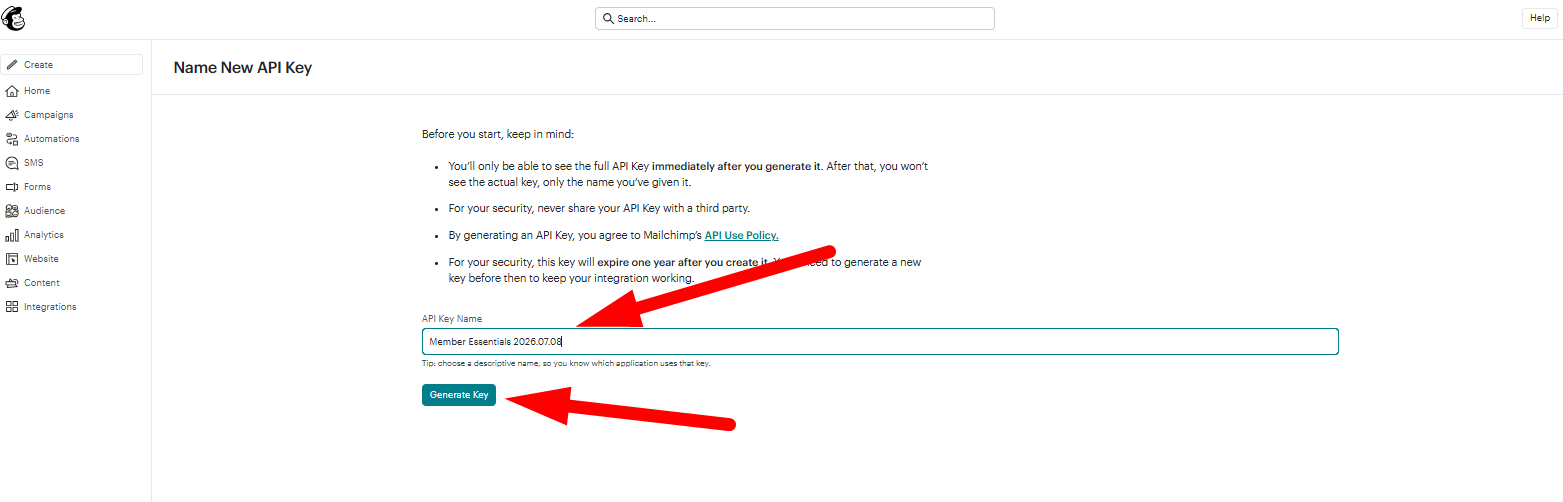
- Once you generate the key, copy it to your clipboard.
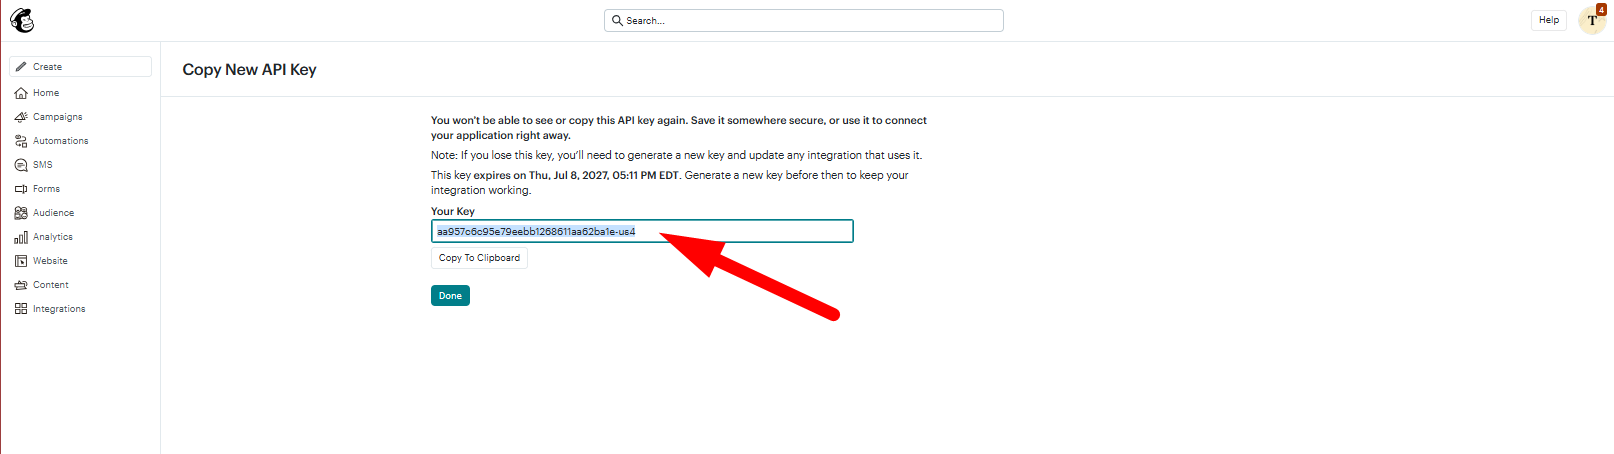
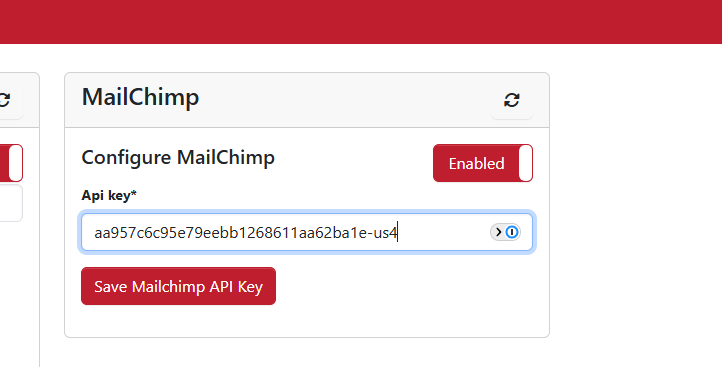
- Go back to the Member Portal > Admin > Member Management, CRM Sync.
- Below MailChimp > API key, enter the API key you just copied.
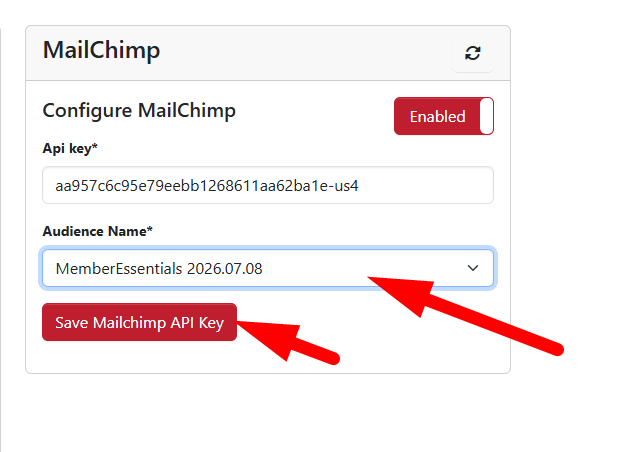
- Next, you will be able to select your Audience Name.
- Click on Save Mailchimp API Key.
- To configure what syncs to MailChimp, select Manage Statuses.
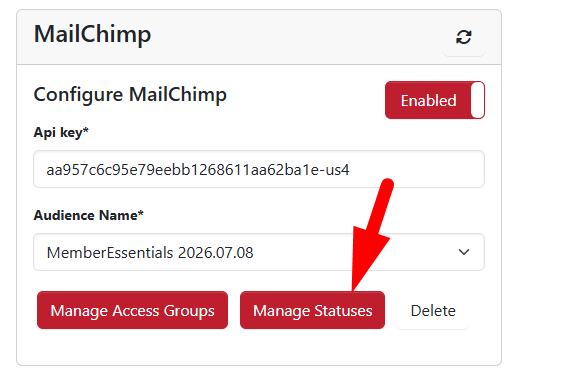
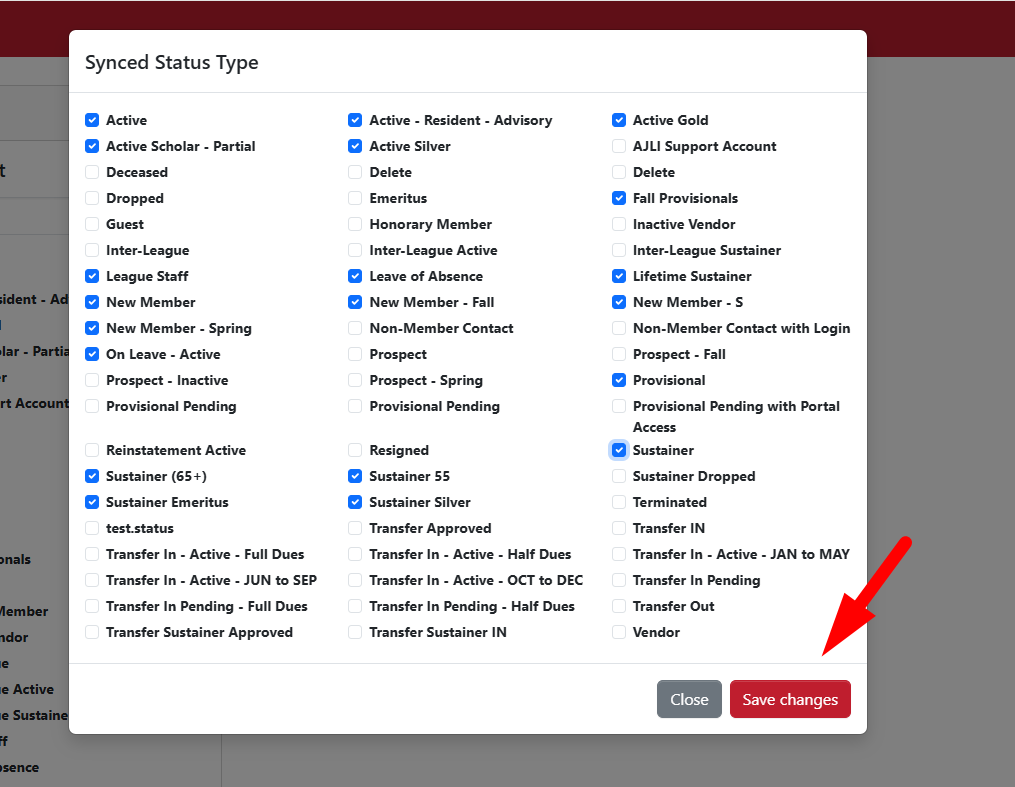
- Select the statuses you want synced over to MailChimp and save your changes.
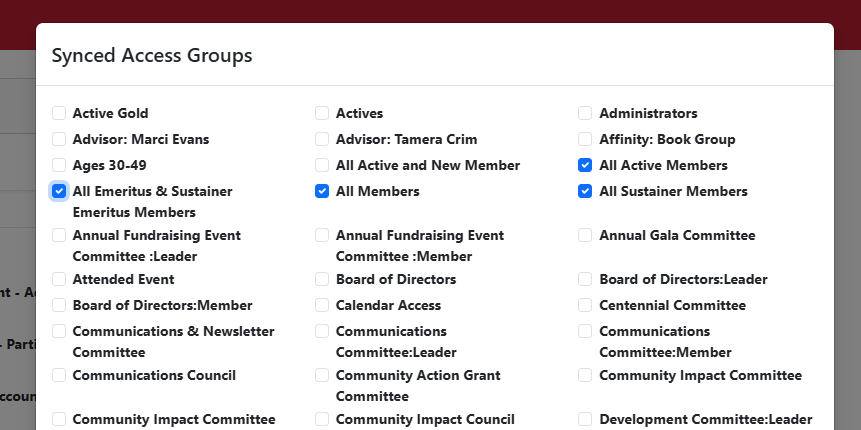
- Next, select Manage Access Groups and choose the groups you want synced to MailChimp. The ones listed below are AJLI system Groups:
- All Active Members
- All Emeritus & Sustainer Emeritus Members
- All Members
- All Sustainer Members
- It can take up to 5 days for all the emails to sync to MailChimp.
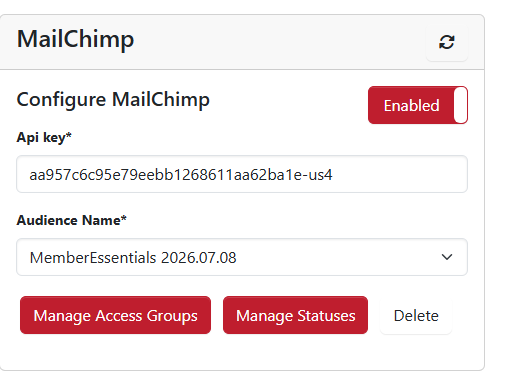
- Check the MailChimp audiences