Create Workflow for Intake
If you do not have a workflow created, please send an email to MemberEssentials@ajli.org to have it created. These are the recommended steps used for Transfers:
- Create Member Profile (will be checked off automatically since they already have a profile)
- Update Profile
- Pay Member Dues and Transfer Fee
Create Local Statuses
There are several statuses that need to be created to distinguish each timeline as described in Setting up Dues for Incoming Transfers following the AJLI Dues Guidelines.
In Admin > Member Management > Status Management, you can add the following:
| Status Name | Parent Status |
| Active - Transfer In - (Jun-Sep) - Incoming | Prospect |
| Active - Transfer In - (Oct-Dec) - Incoming | Prospect |
| Active - Transfer In - (Jan-May) - Incoming | Prospect |
| Active - Transfer In (Jun-Sep) | Active |
| Active - Transfer In (Oct-Dec) | Active |
| Active - Transfer In (Jan-May) | Active |
| Sustainer - Transfer In - (Jun-Sep) - Incoming | Prospect |
| Sustainer - Transfer In - (Oct-Dec) - Incoming | Prospect |
| Sustainer - Transfer In - (Jan-May) - Incoming | Prospect |
| Sustainer - Transfer In (Jun-Sep) | Sustainer |
| Sustainer - Transfer In (Oct-Dec) | Sustainer |
| Sustainer - Transfer In (Jan-May) | Sustainer |
See Create Local Statuses (Member Essentials Plus)
Create Entry Points
Create entry points for each of the local statuses and assign the following statuses. See Adding an Entry Point. Here are some examples of the statuses to use:
| Entry Point Name | Status assigned on entry | Final Status Assigned Upon Completion of Steps |
| Member Transfer - Active - Transfer In (Jun - Sep) | Active - Transfer In - (Jun-Sep) - Incoming | Active - Transfer In (Jun-Sep) |
Member Transfer - Active - Transfer In (Oct - Dec) | Active - Transfer In - (Oct-Dec) - Incoming | Active - Transfer In (Oct-Dec) |
| Member Transfer - Active - Transfer In (Jan - May) | Active - Transfer In - (Jan-May) - Incoming | Active - Transfer In (Jan-May) |
| Member Transfer - Sustainer - Transfer In (Jun - Sep) | Sustainer - Transfer In - (Jun-Sep) - Incoming | Sustainer - Transfer In (Jun-Sep) |
Member Transfer - Sustainer - Transfer In (Oct - Dec) | Sustainer - Transfer In - (Oct-Dec) - Incoming | Sustainer - Transfer In (Oct-Dec) |
| Member Transfer - Sustainer - Transfer In (Jan - May) | Sustainer - Transfer In - (Jan-May) - Incoming | Sustainer - Transfer In (Jan-May) |
Accept a Transfer
To accept a transfer:
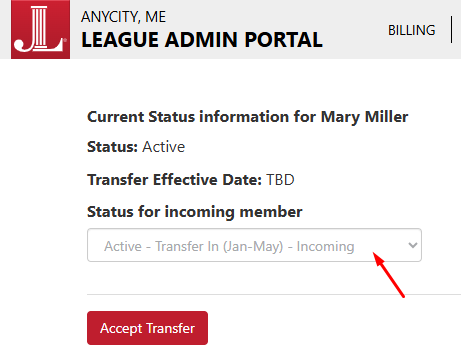
- Go to Transfer Manager, search for the name of the Transfer and below Actions, click Accept.
- Assign the status for the incoming member using what's configured in Status assigned on entry.
Assign Transfer to an Entry Point
You can assign the entry point to a profile, allowing Transfers to update their profile information and pay dues.
- From the Admin Profile, find the profile.
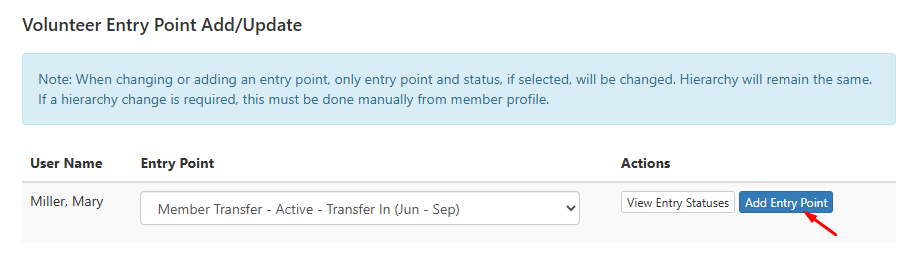
- Then, go to Engagement Information > Intake Manager > Add Entry Point.
- Choose the Entry Point you want to assign to the member's profile. See Updating a Prospect's Entry Point
- Go back to their Profile.
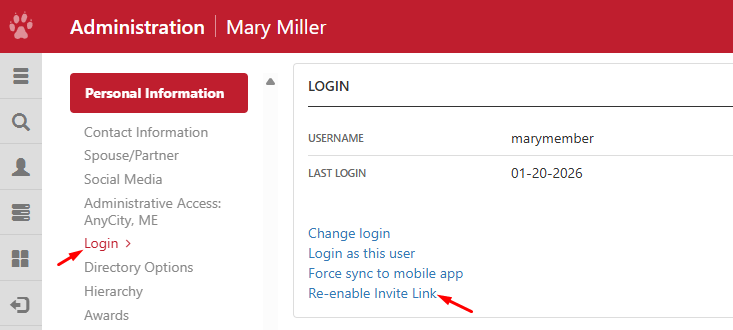
- Find Personal Information > Login and check to see if the Transfer already has an account set. If she is a Transfer and is transferring from another League that uses Member Essentials, she will keep the same username and password to log in. If there is no account, you can reset the invitation link. See Re-enable Invite Link
Managing a Transfer
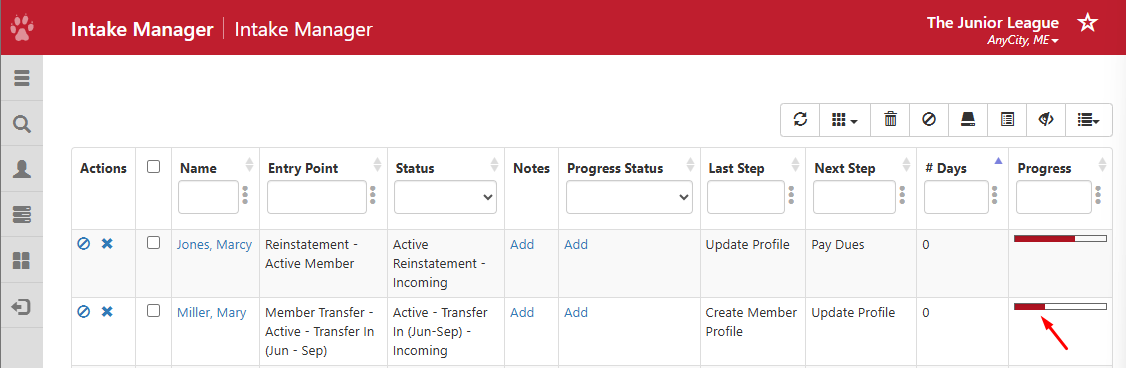
From the Intake Manager, you can check her status by clicking on the red bar below Progress. After she pays dues, she will be able to access the homepage and become an official Member. See Managing Prospects with Intake Manager